Day 357 – Crochet Candy

Hello Yearlings!

My days have been spent in a rushed and wooly mess as of late. I’ve been rushing to finish up all of my last minute christmas decorations/gifts that can be made by hand without having to wait until after Christmas to give them. This is the problem with being a crafter: you actually get around to a proper gift giving holiday and you’ve completely run out of the time required to make your crafty gifts.

I actually eyed this pattern last year when Twinkie Chan made it, but I didn’t have the time to just sit down and make a garland for myself. So I told myself that this year I would at least make little crocheted candies and put them all over the tree. Also, when I make more I can make then in white and red and then they will fit in with our apparent candy cane theme. Though now I’m actually starting to think that perhaps our theme this Christmas is just candy, as none of us can seem to stop eating it.

You can find the pattern here.

IMG_8929.jpg

Ingredients:

Worsted weight yarn, preferable in bright and fantastic colors

Size I crochet hook

1 1/2 in styrofoam ball

These whip up crazy quick. If you’ve got a little bit of time to sit in front of the TV watching Netflix then you can make a whole garland of these in no time flat. They would also make insanely cute hair decorations. Just glue/sew an alligator clip onto the bottom and pop into your hair. I might just do that for myself.

Lots of Love,

Maya
Day 214 – My Adventure Time Birthday Party!

Hello Yearlings!

Soon I will be welcoming the start of my 26th year on this planet. I’m sure that’s a weirder thing for my mother than it is for me, but I’m still surprised that I managed to get this far. Normally I would make a big to-do about my birthday, stress myself out planning it, get to the actual day and have no fun because I’m so worried about how it’s going that I can’t just stop and enjoy myself. Perhaps foreseeing this, my friend Jess decided to plan everything for me and kept me (almost) completely in the dark until the moment that I walked into my own party.

I can honestly say that I had no idea what to expect. Everyone had already told me that I was having a birthday party, but nobody would tell me anything else. I didn’t know if there was a theme, if I needed to bring anything or invite anyone. Something like this would normally be a huge point of stress for me, but I trusted that everything was in capable hands and that allowed me to actually look forward to my birthday. It was nice to have other people stressing out over everything for me for once. That was new.

Ingredients:

Amazing friends

Lots of paper crafting

Jess really outdid herself. Apparently there was a spreadsheet, that will live in infamy, of all of the things that had to get done for my birthday, as well as who had to do them and when they needed to be done by. Jess is basically the most precious human being on the planet and all of my friends are amazing for putting up with all of her neurosis. They really managed to pull off quite the shindig. I’m mostly just surprised at how well they managed to keep it all a secret.

I’ve told Jess that’s she’s totally screwed herself over because now I’m going to expect awesome birthday parties every year! Though she basically told me the exact same thing when it came to her friendaversary gift, so we’re kind of both in trouble now. We’ll just have to keep one-upping each other until we’ve collectively accumulated a debt that rivals the nations. Next year is going to be insane.

Lots of Love,

Maya

Day 193 – Potty Mouth Bars

Hello Yearlings!

During our trip to Italy, staying in an innumerable number of hotels it dawned on me that the small hotel soaps sort of reminded me of really tiny white chocolate bars; then in the back of my mind I just sort of though ‘Ha wouldn’t mind having my mouth washed out with soap if it were white chocolate.’ I am not going to pretend that I understand where my brain gets the things that it thinks or how I manage to come up with these things but I like to credit my wild imagination for most of my crafts inspiration.

Naturally one of the first things I did when I got back to the states was purchase white chocolate, as I don’t normally have it in the house, then today I decided would be a good time to give this project a go. It’s seriously ridiculously easy and doesn’t require any special equipment or tools even. Everything I have you could easily sub out for something slightly more available.

Temper your chocolate by whatever means you prefer and then pour it into your mold.
Temper your chocolate by whatever means you prefer and then pour it into your mold. Reserve some of the chocolate for later.
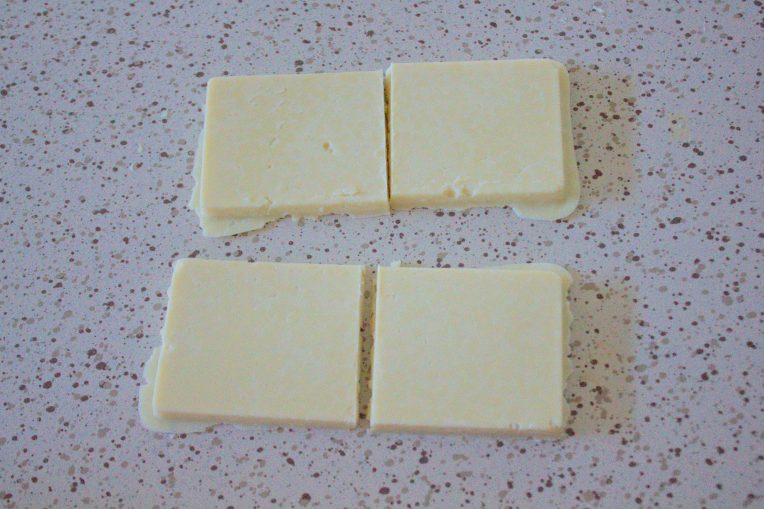
Using a very sharp knife, chop up your chocolate into whatever size you want your
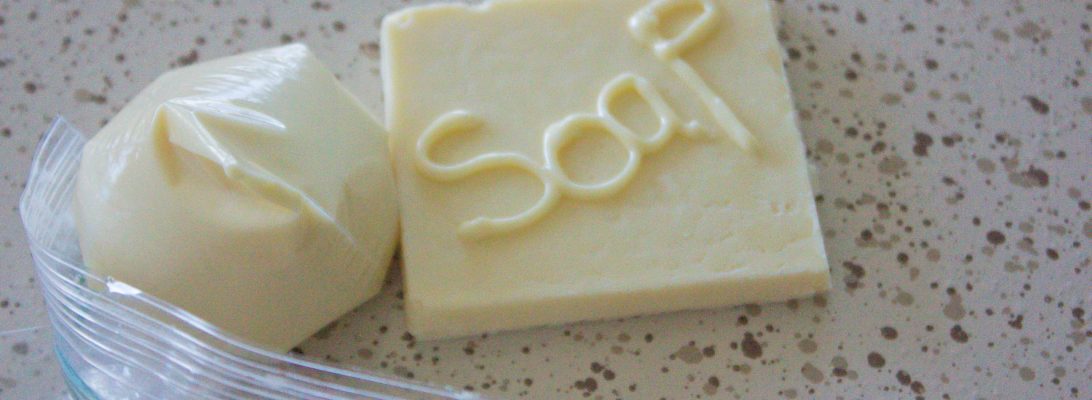
Using a very sharp knife, chop up your chocolate into whatever size you want your “soaps” to be.
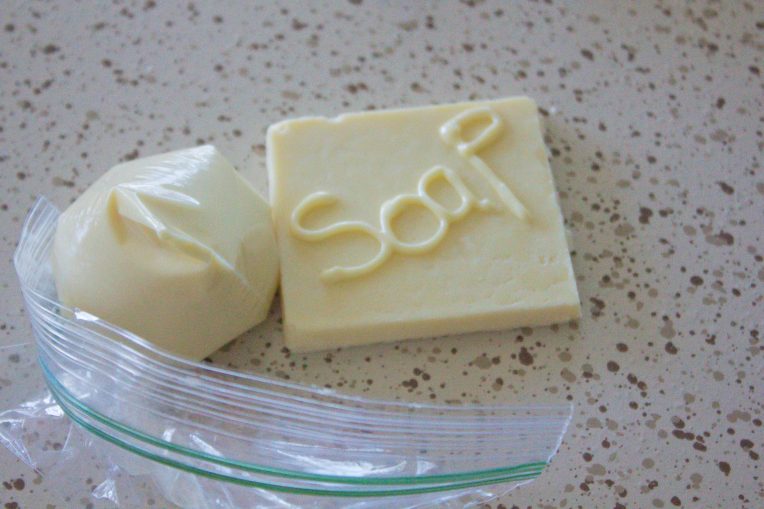
Using your reserved chocolate and a plastic bag that you've cut a VERY small hole into, or a piping bag with a #1 tip. Write 'Soap' on your chocolates and package however you like.
Using your reserved chocolate and a plastic bag that you’ve cut a VERY small hole into, or a piping bag with a #1 tip. Write ‘Soap’ on your chocolates and package however you like.

Ingredients:

8 oz white chocolate

Chocolate mold

Plastic Bag

If I had some special colored foils lying around I would wrap these bad boys up and put a little sticker on them. I’m still trying to figure out how to properly manipulate editing materials so that one day I’ll be able to make a super cute logo for a project. Once I get that down I’ll be basically unstoppable.

Lots of Love,

Maya

Day 151 – Kaju Katli

Hello Yearlings!

I discovered kaju katli, or kaju burfi, when I accidentally bought WAY too many cashews for a recipe I was working on and needed something to do with them. Luckily I stumbled upon a delicious recipe called kaju katli, but all of the experiences I had ever had with it had been unfavorable to me. It’s usually made with almond meal, water, sugar and sometimes an extra flavoring like rose water or pistachio. Normally it’s overly sweet and flat tasting with little to no complexity, so when a friend turned me on to the idea of using condensed milk and butter I decided to give it a go.

Start by taking your whole cashews and grinding them up until you get a fine meal. You have too be careful here, if you grind too much you get nut butter but if you grind too little you get chunks. I actually had a 400g bag of whole cashews and just ground them all up and used what I needed.
Mix your milk into your cashew meal until it becomes a paste. This is also a great way to tell if you'e added enough cashew, because if the paste is too liquid then you need to add more of your cashew powder.
Mix your milk into your cashew meal until it becomes a paste. This is also a great way to tell if you’e added enough cashew, because if the paste is too liquid then you need to add more of your cashew powder.
Add your condensed milk and milk/cashew paste to a pan over medium low heat and cook for about four minutes, stirring constantly. This is a great time to melt your butter and once you've cooked your paste long enough add in your butter a few tablespoons at a time until and stir to combine in between every addition. Continue to cook for about 8 minutes or so until it becomes extremely thick and rolls easily up into a ball.
Add your condensed milk and milk/cashew paste to a pan over medium low heat and cook for about four minutes, stirring constantly. This is a great time to melt your butter and once you’ve cooked your paste long enough add in your butter a few tablespoons at a time until and stir to combine in between every addition. Continue to cook for about 8 minutes or so until it becomes extremely thick and rolls easily up into a ball.
Once everything has come together as desired, smooth into a pan to cool and even out with a rubber spatula. Leave to set for a couple of hours or overnight. Store in the fridge and serve to the eight people on the planet you actually like.

Ingredients:

1 1/2 cup whole cashews

1/2 cup sweetened condensed milk

1/2 cup milk

5-6 tablespoons butter, or ghee if you want to be traditional

This has easily become one of my favorite candy recipes in my arsenal, though I make no bones about the fact that there is absolutely nothing healthy about this recipe. It’s pure indulgence, but it’s rich and delicious with the perfect amount of sweetness that accentuates the natural flavor of the cashew instead of weighing it down. I’m sure that you could use less butter and low-fat milk if you wanted to but I don’t think that it’s worth it to cut corners where flavor is concerned. It’s just better to consume moderation. Or you could do what I do and pawn it off on all of your friends and co-workers!

Lots of Love,

Maya

Day 123 – Kawaii Denim Vest Pt. 1

Hello Yearlings!

Do you ever just have those days whenever you’ve decided that you’re giving up on being a rational thinking adult with goals and responsibilities and instead you’re going to dye your hair a rainbow medley of pastel shades and dress like a doll? Or perhaps you’ve finally realized your calling of becoming a woodland nymph and are currently in the process of growing antlers and galavanting through the forest. Whatever the case may be there are most assuredly days when even the most grounded among us want to throw caution to the wind and run away to join the circus. For some of us this is the every day, but I digress.

This project spawned from an intense desire for whimsey and I basically just did my best to take pictures as the ideas came to me along the way. I picked up all the embellishments for this project from Snapcrafty on Etsy. If you’re ever looking for a super kawaii pick-me-up then I highly recommend her store. This idea just sort of came to me after I impulse shopped on her store and while I was staring at the cabochon I came up with the idea to glue them to the pocket of an old denim jacket I had lying around.

Take your glue and, after figuring out exactly where you want everything placed, glue them down and allow them to dry. These are big pieces so they might need more glue/drying time then you would normally thing.
Once your cabochon are dry move on to your collar. I picked up the 3 mm Rose glass cut crystals from her site and used those to make a triangular pattern that eventually flares out a little bit. I just glued them down in place, but be warned this part takes the most time because the parts are so small.
Once everything was dried and finished this was how the front looked.

Ingredients:

Denim Vest

Glue, I used both fabric and E6000

Kawaii Cabochon

3mm rhinestones in Rose

This turned out super freaking cute and I’m really glad that I didn’t go into this project with an idea. I’m a perfectionist so whenever I can’t seem to get something out of my head and into the world I tend to get really frustrated and want to just give up entirely. This came very naturally to me and evolved very organically, so once I got started all I had to do was just go with it and allowed myself to see where it would take me. I’m planning to do a whole slew of other things to the back, so hopefully I will have that done for you guys soon.

Lots of Love,

Maya
Day 99 – Office Revamp: Pen Cup

Hello Yearlings!

So I realized I hadn’t done anything for my office recently, so I thought I would fix that by making a pretty pen cup for my pretty new crochet pens. The best part about this tutorial is that I literally made the pen cup out of an old can. Yep, that’s right, an up-cycled can!

IMG_5718
Your ingredients.
IMG_5722
Measure your cloth and cut as close to the proper width as possible. Remember to leave some overlap in the length so that you can make a better seal with the mod podge. Always better to have too much than not enough.
IMG_5723
With your sponge, Mod Podge your entire can.
IMG_5725
Then just roll on your fabric. Where you have the overlap be sure to add extra Mod Podge so that it creates a firm seal between the two layers of fabric.
IMG_5728
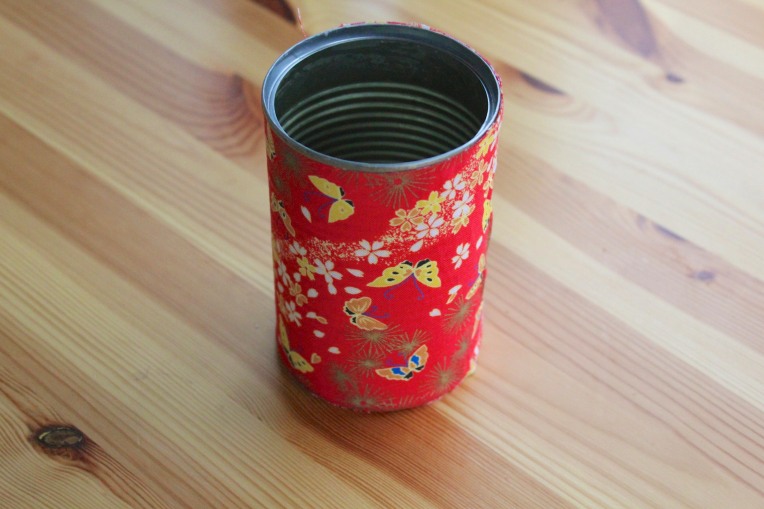
Then just let dry and put your pens in it. Now you have a new, and environmentally friendly, pen cup.

Ingredients:

1 clean old can

Fabric

Mod Podge

Sponge

Cutting utensil

This turned out significantly sturdier than I would have thought, but if you want some extra weight you can always add something like rice or beads to the inside of the can to give it some weight. That would also help your pens to stay upright in whatever place you left them! I might even decide to add some ribbon or fabric paint to the outside.

I’m really loving how my office is finally starting to feel like it’s coming together. There’s a lot less grey and a lot more of my very colorful personality that’s finally beginning to shine through. Now I just have to convince them to let me paint the walls!

Lots of Love,

Maya
Day 40 – Homemade Strawberry Marshmallows

Hello Yearlings!

OH. HELL. YES. Homemade strawberry marshmallows. You heard me! I made some delicious marshmallows from the strawberry sugar I made the other day. They were impossibly easy and a huge hit with everyone I shared them with. They’re literally already gone.

IMG_4828
Ingredients.
IMG_4835
Bloom the gelatin in 1/2 Cup of water. Allow to sit for 5 minutes to set.
IMG_4841
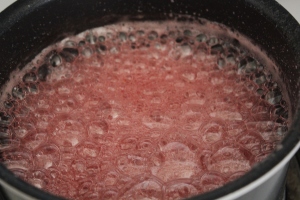
Boil 1/2 Cup water, corn syrup and sugar. Bring to 240 F then remove from the heat immediately.
IMG_4842
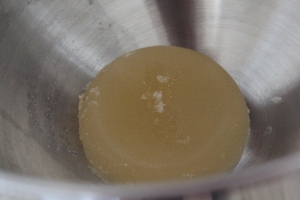
Put your gelatin in the mixer and turn it on low to break it up a little.
IMG_4845
Then slowly pour the sugar syrup in.
IMG_4846
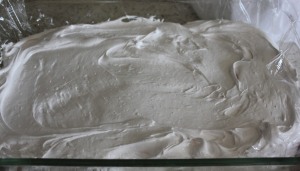
Put your mixer on high and let whip for 8-10 minutes.
IMG_4853
Put the mixture into a greased and lined tray, I chose a 13×9 because I wanted thinner marshmallows.
IMG_4857
Cover with more greased plastic wrap and let sit for 6-8 hours.
IMG_4873
Once they’ve set mix your powdered sugar and corn starch and flour a work surface with it. Then flip your marshmallows out onto said work surface.
IMG_4877
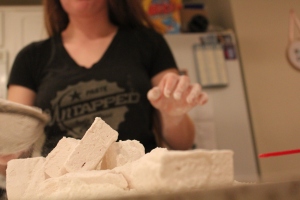
Cut them to whatever size you want, roll them in the powdered sugar/corn starch mixture and shake them with a fine mesh strainer to get rid of any excess powder.
IMG_4881
Then plate, serve and watch them magically disappear.

Ingredients:

3 packets of gelatin (roughly 24g)

1 Cup of water (split 1/2 and 1/2)

1/2 Cup Light Corn Syrup

1 1/2 Cup Caster Sugar

1/2 Cup Strawberry Sugar

1/2 Tbs Vanilla

1/2 Cup Powdered Sugar

1/2 Cup Corn Starch

These were really easy and rewarding to make. The worst parts are easily the waiting for 8 hours and having the mixer on high for 10 minutes. Both of those parts were annoying, not going to lie. If you can get over that though, these are totally worth it. They have the subtlest strawberry flavor from the strawberry sugar, but it really comes through and makes them even more amazing. I can’t wait to see what kind of s’mores they make!

Lots of Love,

Maya

Day 38 – Homemade Peanut Butter Cups

Hello Yearlings!

I know that this isn’t particularly Valentines-y, but today was the party for my friend Jase’s birthday and there are very few things he loves more in this world than Reese’s peanut butter cups so I thought what the heck, let’s see if we can make them at home! Of course, now that I’ve made them I realize what a huge mistake it was. These are so good and so easy to make that I’m in danger of making them all the time and overindulging in them.

IMG_4800
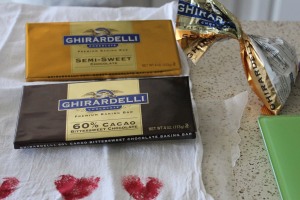
We mixed these two chocolates half and half.
IMG_4807
These were the ingredients for the filling.
IMG_4805
We tempered the chocolate with this big scary sous vide machine. We’ll come back to this later.
IMG_4809
Fill a cupcake tin with liners. I just used these ones that I had lying around.
IMG_4814
We tempered the chocolate.
IMG_4812
Then we mixed the butter, peanut butter and confectioners sugar in a small mixing bowl.
IMG_4815
Our components.
IMG_4816
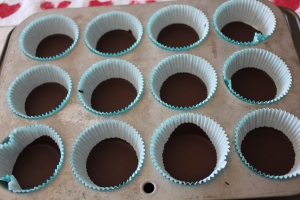
Lay down your first layer of chocolate. You’re trying to get about an ounce of chocolate into each cup.
IMG_4817
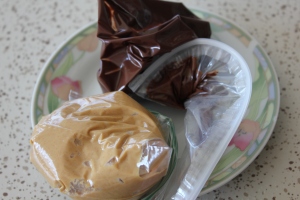
Pop your chocolate into the freezer and once it’s set, and if it’s properly tempered, it will look like this with a gorgeous matte finish.
IMG_4824
Then you add about an ounce of the peanut butter filling to each cup. Don’t be discouraged when it looks like peanut butter poops.
IMG_4825
Spread the peanut butter filling by whatever means necessary. I just used a clean finger.
IMG_4826
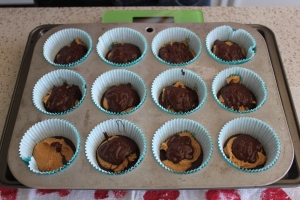
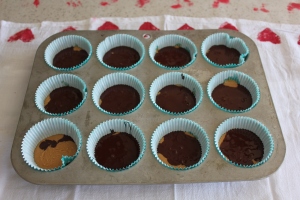
Cover the tops with another ounce of chocolate. As you can see I ran out of chocolate at the very end. Clearly this had nothing to do with all of the chocolate sampling I was doing throughout.
IMG_4827
Then just tap the pan on your countertop the even out the chocolate and get rid of any air bubbles that might be hiding out in there.

You can find really great resources on tempering chocolate here and sous vide tempering here. I found both of these articles very useful. If you comfortable trying to temper chocolate, then you don’t have to. You can buy pre-tempered chocolate and just warm it up in the microwave or over a double boiler.

Ingredients:

1//4 Cup Peanut Butter

1Tbsp Butter, softened

25 g Confectioners Sugar

8 oz Chocolate, we used a mix of bittersweet and semi sweet

These were a total hit at the party. The mix of darker chocolates, instead of the customary milk chocolate was a surprising success. It really deepened the flavor of the peanut butter cups and added a whole new layer of complexity. They were amazing, and the birthday boy had to hid them from the rest of the party goes so that they wouldn’t be devoured.

Also, you could totally turn this into a Valentines treat if your significant other, or anyone else in your life, really loves peanut butter cups. All you have to do is make these in Valentines themed liners and place them in a gift box and present to them to your special someone. Adding a personalized note would make it even more romantic!

Lots of Love,

Maya

Day 36 – Strawberry Sugar

Hello Yearlings!

Oh yes, that’s right, you heard me. It’s strawberry sugar time. This recipe, much like my Vanilla Sugar recipe, is crazy dead simple and incredibly delicious. The applications with this stuff are endless! You could put it on pastries, or make marshmallows with it. You could even add a dash to some fresh fruit to give it a really summery taste.
IMG_4760
Put your cup of sugar in the food processor. You can totally make more than a cup, but you’ll just have to up the quantities or sugar and berries.
IMG_4761
Use about a handful of freeze dried strawberries per cup of sugar.
IMG_4764
You can add fewer strawberries but I wanted a really strawberry-y flavor so I didn’t hold back.
IMG_4768
It came out so beautiful and delicious. In theory you could put everything through your sifter and get out any of the seeds or unblitzed chunks, but I prefer the rustic texture.
IMG_4767
Then you just have to figure out what you’re going to store it in and how you plan to get it in there. I highly recommend a funnel.
IMG_4769
And voila, here is the finished product!

Ingredients:

1 Cup Sugar

Handful freeze dried strawberries

Seriously, this stuff is so cool! I am totally in love already, and I can only see it getting better with age. It also totally fits the criteria for being pink and girly and Valentines-y. I’m totally smitten. Now I just have to hide it from myself so I don’t roll my entire body in it!

Lots of Love,

Maya